Welcome to the Student Planner Resource Page
The release of the Vergil Student Registration Engine includes enhancements to the Vergil Student Planner to include:
- Visibility of Planned, Registered, and Waitlisted classes
- The ability to Register for all classes on your planner
- Hide/Display Calendar View
- Tools to Managed Registered Class Sections
Managing Classes in Your Student Planner
Your Student Planner allows you to plan Class Schedules for the current and future terms.
To add classes to your Student Planner:
- Select the term you want to plan for on the upper right-hand side of Vergil Course Search Window.
- Search for the course(s) you are interested in using the Course Search filters.
- Once you have found a Course of interest, click on the black arrow or section number to expand the Class Section information window.
- Click the blue "Add to Plan" button.
Once these steps are complete, the class will be visible in the My Planner window in Course Search and the My Planner page.

To display or hide the calendar view of your Planned, Registered, and Waitlisted Courses, click the Hide Calendar Button above the Calendar.

Hidden Calendar Planner View:
When your Planner Calendar is Hidden your Classes are organized by their registration status: Planned, Registered, Waitlisted. To unhide and display the calendar again, click on 'Show Calendar.'

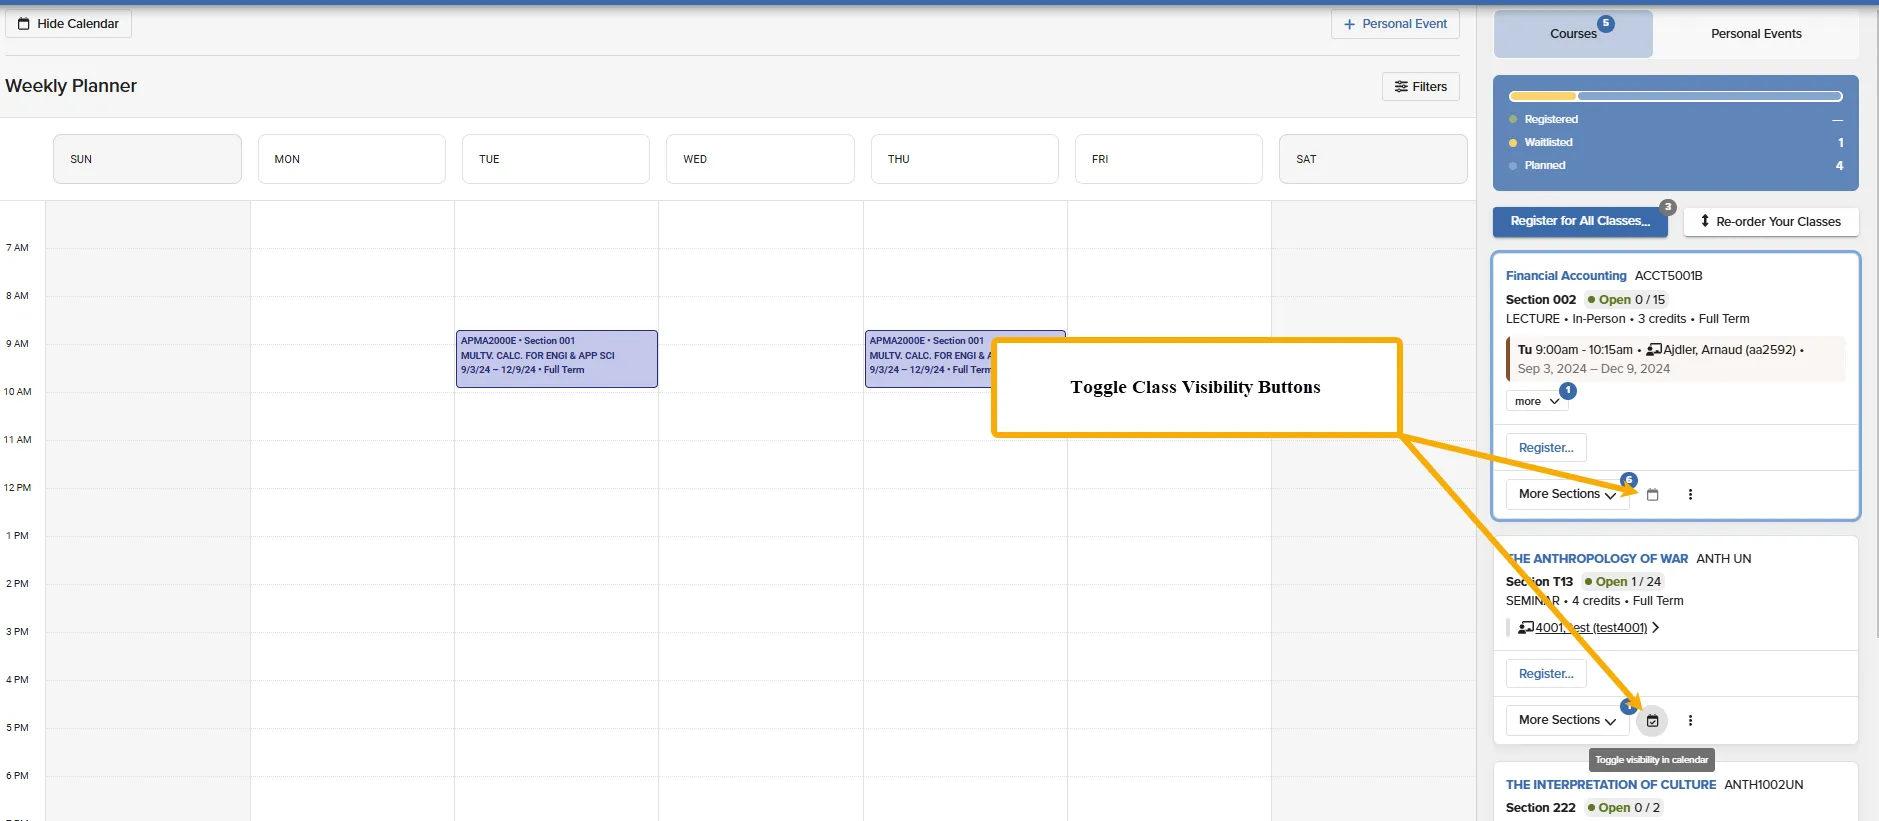
To efficiently organize and customize your class schedules, the Planner now includes a button to toggle the visibility of classes on the Calendar and list of Planned Classes.
If a Class is already displayed on your Planner calendar, the visibility button will have a checkmark inside of it. However, if it is not visible on the calendar the visibility button will have a checkmark.
Tools have been added to support organizing and prioritizing Classes in the Student Planner. To Organize the classes on your planner, Click on the 'Re-Order Your Classes' Button.

From here you have two options to organize the list of classes:
- Click on the 'Priority' button to set your preferred numerical position for the Class. The class will automatically shift to that position.
OR
- Click on the two stacked lines to manually change the Class' position and organize your courses.

Managing Registrations
Once you have planned your desired Semester Schedule, you can Register for all Classes on your planner using the 'Register for All Classes Button' This button is visible on both the hidden and unhidden Calendar view.

Registered and Waitlisted Classes will be accessible within your Student Planner. This means you will also have the ability to Modify your Registration via:
- Swapping Class Sections
- Dropping Registered Class
- Rescinding a Wait List Application
- Removing yourself from a Wait List


Accessing Your Student Planner
Your Student Planner can be accessed in two different ways from the Course Search Page:
- Expand the My Planner panel on the right hand side of the page
OR
- Click on the My Planner Header tab at the top of the page

To access your Student Planner from the Dashboard - click on the My Planner link under tabs and tiles on the page.
