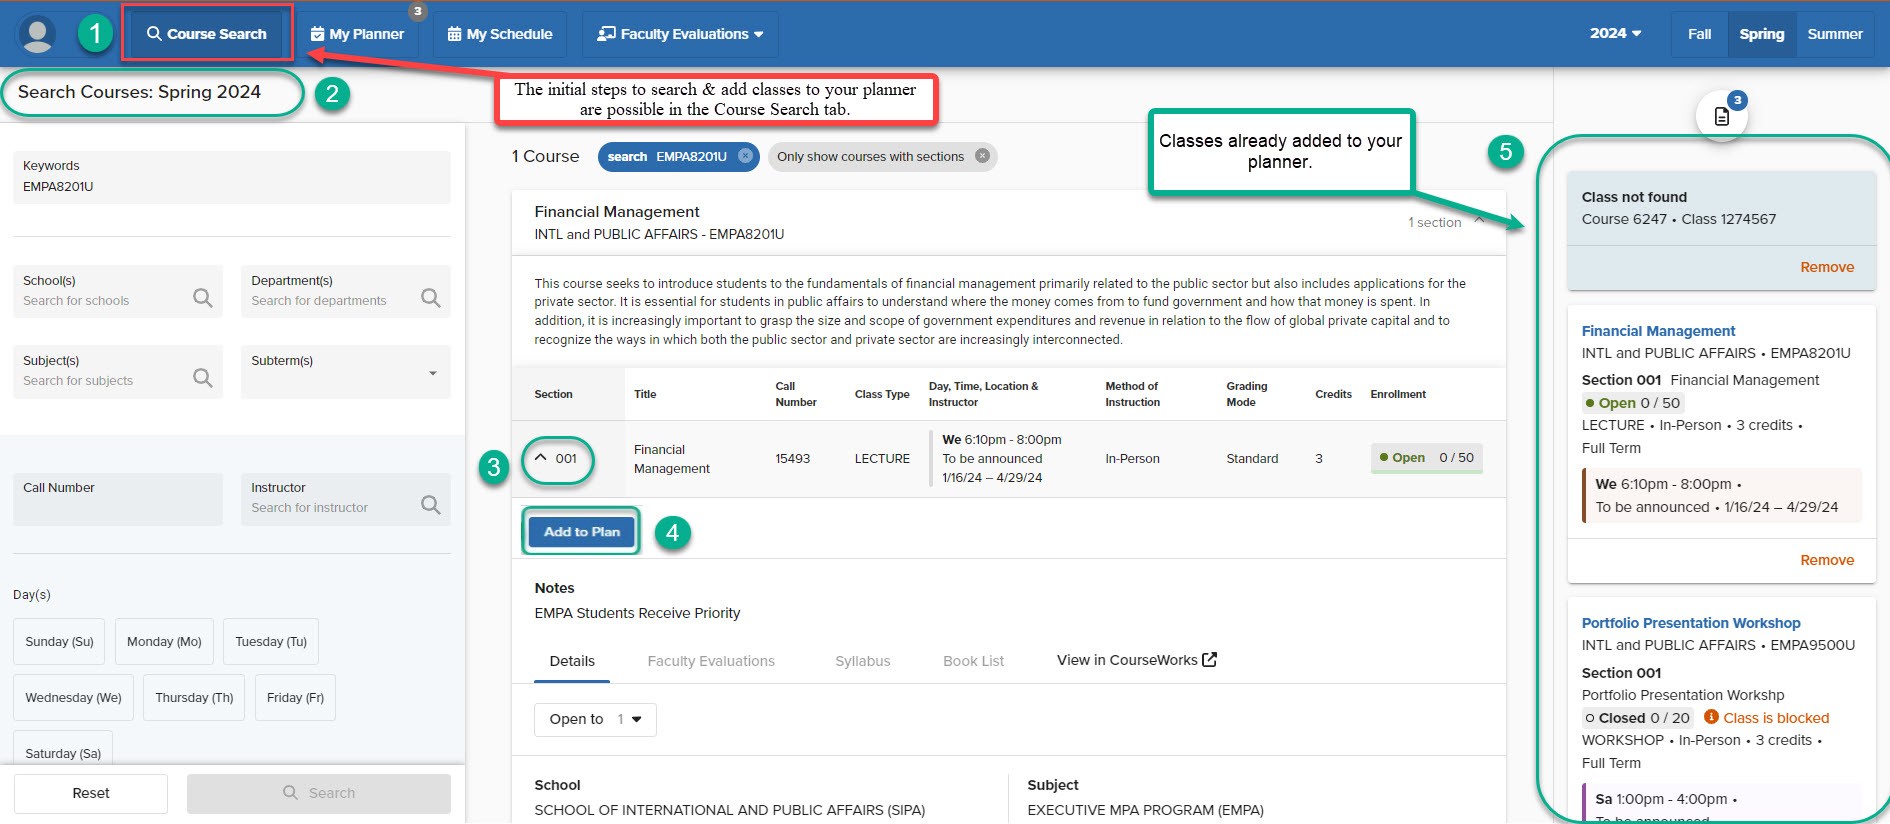
Adding Courses To Your Planner
We've streamlined the process of adding courses to your Vergil planner for increased efficiency and accessibility. The steps below outline the exact method:
- Enter and select the information to complete your class search in the "Course Search" tab.
- Ensure that your term of interest is visible so that your search results are accurate.
- Select the course and course section that you are interested in. Then, click the highlighted arrow or section number to expand the section information box.
- Click the blue "Add to Plan" button.
- Review your courses and their respective sections that you have added to your planner.
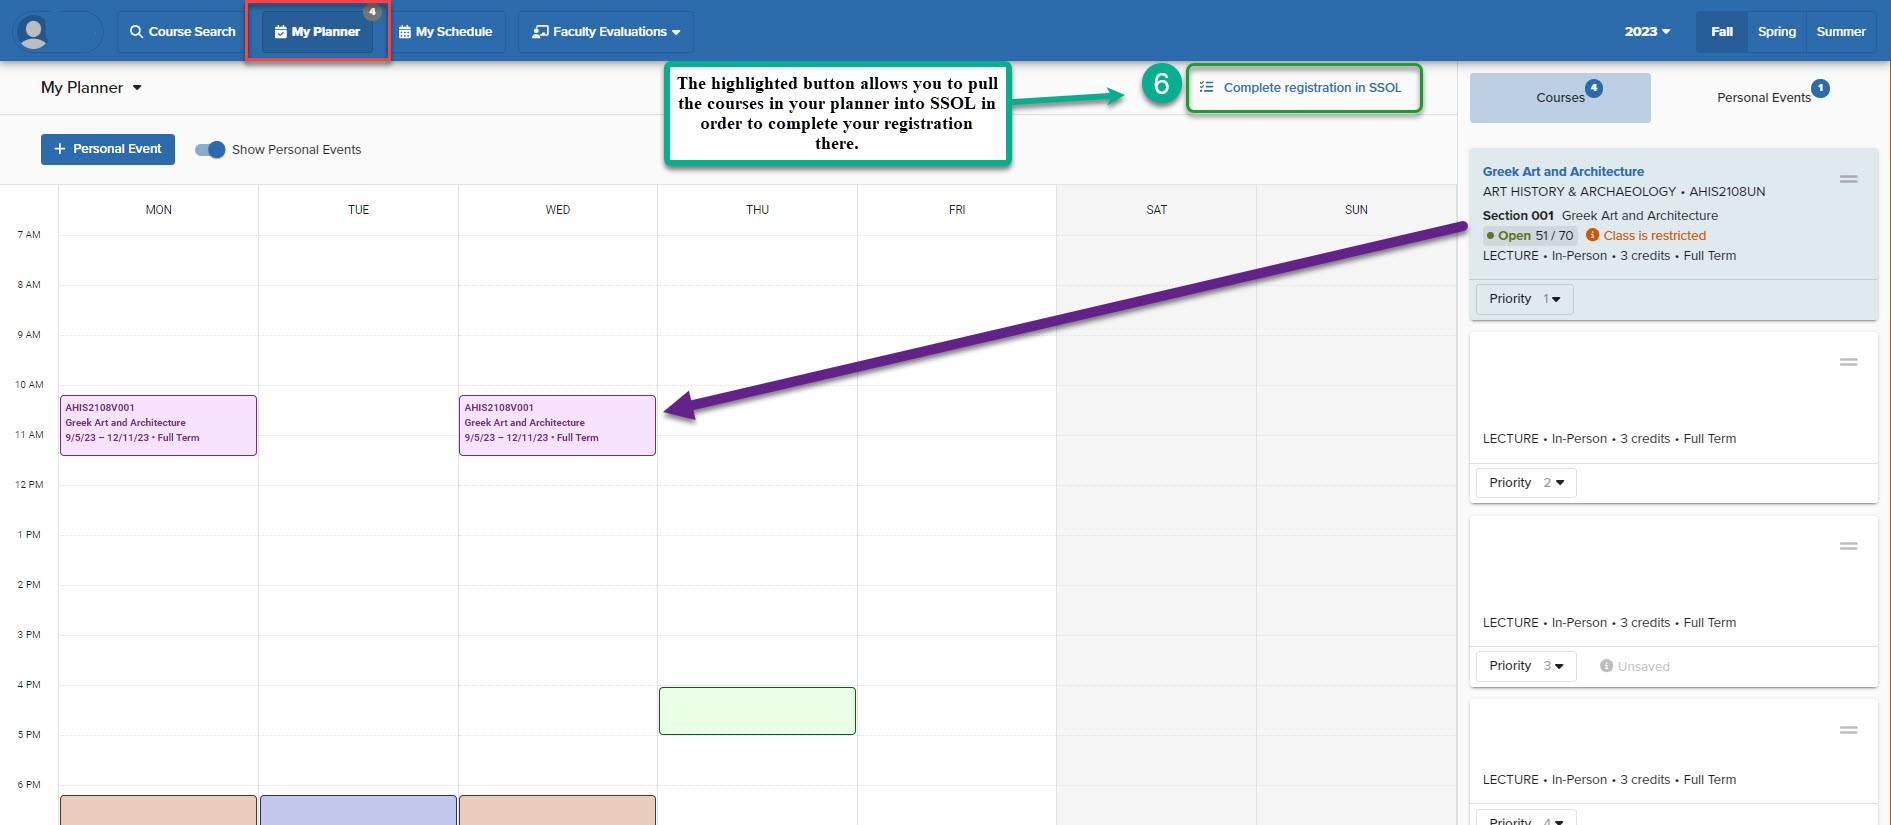
- Under the "My Planner" tab, review the courses in your planner and course schedule. Then, click the "Complete Registration in SSOL" button to pull the classes in your planner to SSOL to register for the term.